
Silence the Chirp: Your Essential Guide to Beeping Smoke Alarms
How to Fix a Beeping Smoke Alarm: A Complete Home Safety Guide is here to help you conquer that annoying noise and restore peace to your home. We’re going to walk through the simplest fixes to the trickier electrical issues so you can sleep soundly again.
This isn’t just about silencing noise, though; it’s about making sure your home is truly safe. That little beep is actually your device trying to tell you something important. We’ll decode those messages together and ensure your smoke alarm is ready to do its crucial job, protecting you and your loved ones from fire hazards every single day.
The Importance of a Functional Smoke Detector
Think of your smoke detector as the tiny, silent superhero of your house. It works tirelessly 24/7, and that small battery or hardwired connection is the lifeline that keeps it vigilant. When it stops working correctly, even for a moment, your household safety net has a small tear. Ensuring it’s functional is arguably the most vital, yet often overlooked, home maintenance task we have.
A well-maintained, properly working smoke alarm can literally be the difference between a close call and a devastating event. Fires can move incredibly fast, and those few precious seconds of warning are what give you and your family time to get out safely. Never ignore that sound, it’s the cue to check, fix, and protect!
What’s That Sound? Identifying the Type of Smoke Alarm Beep
Understanding the language of your smoke alarm is key to a fast fix. It doesn’t just make one kind of noise! The detector uses specific patterns of Beeps and chirps to communicate different types of emergencies or maintenance needs. Learning to differentiate these sounds saves you time and ensures you respond correctly.
If you hear a continuous, ear-splitting, three-beep pattern repeated over and over, that’s the real fire alarm. If you’re hearing a quick chirp about once every 30 to 60 seconds, that’s typically a maintenance notification. Pinpointing the exact noise pattern is step one in our mission to silence the alert!
Understanding the Difference Between a Chirp and an Alarm
A chirp is a soft, periodic sound, often a single, quick pulse every minute or so. This is usually your friendly reminder that a minor issue needs attention, such as a low battery or dust interfering with the sensor. It’s an urgent maintenance notification, not an emergency.
An alarm, on the other hand, is a loud, rapid, continuous siren that sounds three to five times repeatedly. If you hear this, you must treat it as a real emergency and follow your fire escape plan immediately. Never assume a continuous alarm is just a malfunction. Always evacuate first and investigate later when it’s safe!
The Low Battery Warning: The Most Common Culprit
Without a doubt, 99% of those late-night wake-up calls are due to the low battery warning. This single, irritating chirp happens because the battery is losing its power and can no longer guarantee the device’s full functionality. The smoke alarm needs a minimum level of control to stay on guard, and once it dips below that threshold, it starts complaining.
The timing of this chirp is notoriously sneaky. It often happens in the dead of night because the overnight temperature drop can cause a slight dip in battery voltage. This small drop is just enough to trigger the warning signal. It isn’t very pleasant, but remember, the detector is just doing its job, letting you know it needs a power boost!
The End-of-Life Chirp: Knowing When to Replace the Unit
Did you swap the battery for a brand-new one, only for the irritating chirp to persist? If so, your smoke detector might be giving you its final goodbye. Most manufacturers design smoke alarms to have an effective service life of about 8 to 10 years. After this time, the internal sensing components become less reliable.
When a detector reaches this decade mark, many units are programmed to start a unique “end-of-life” chirp, a signal that no battery change will fix. If your detector is 10 years old or more, stop buying batteries and start shopping for a new unit! It’s simply time for an upgrade.
Intermittent Beeping: Checking for Dust, Humidity, or Power Issues
If the beeping is inconsistent, stopping and starting without a predictable pattern, the issue might not be the battery itself but the environment or a temporary hiccup. A common cause is a dirty sensing chamber. Dust, tiny insects, or even paint fumes can trigger a momentary false alarm or interference, leading to an erratic chirp.
Humidity or extreme temperature swings can also wreak havoc on the sensors. If your alarm is near a poorly insulated attic hatch or directly above a bathroom door, the environmental changes might be confusing. Try giving it a good cleaning and checking its location before moving on to bigger fixes.
Step-by-Step Guide to Replacing Your Smoke Alarm Battery
Replacing the battery is a simple task, but doing it correctly prevents the alarm from chirping. First, gently twist or slide the smoke alarm base off the ceiling mounting plate. You usually don’t need a screwdriver for this part. Take a moment to identify the correct battery type for your model, which is often stamped on the inside of the unit.
Always install a new battery right away; leaving the compartment empty might cause a different error code or leave you unprotected. Once the fresh battery is installed, make sure to push the test button to ensure the full alarm sounds loudly. After confirming the alarm works, securely twist the unit back onto its mounting plate.
Safety First: Turning Off the Power
For homes with hardwired smoke alarms (those connected directly to your home’s electrical system), safety is paramount before you handle wires or batteries. Always turn off the power to the smoke alarm circuit at your main electrical panel. Never skip this step!
Before you start detaching the alarm from the ceiling, use a voltage detector or flip a light switch on the same circuit to confirm the power is actually off. This helps you avoid the risk of electric shock when disconnecting and reconnecting the unit.
How to Open the Detector and Locate the Battery Compartment
Opening the detector usually involves a simple counter-clockwise twist. Most models have arrows or labels on the sides to indicate the direction of detachment and reattachment. Don’t pull too hard, especially on hardwired units, as they are often still connected by wires!
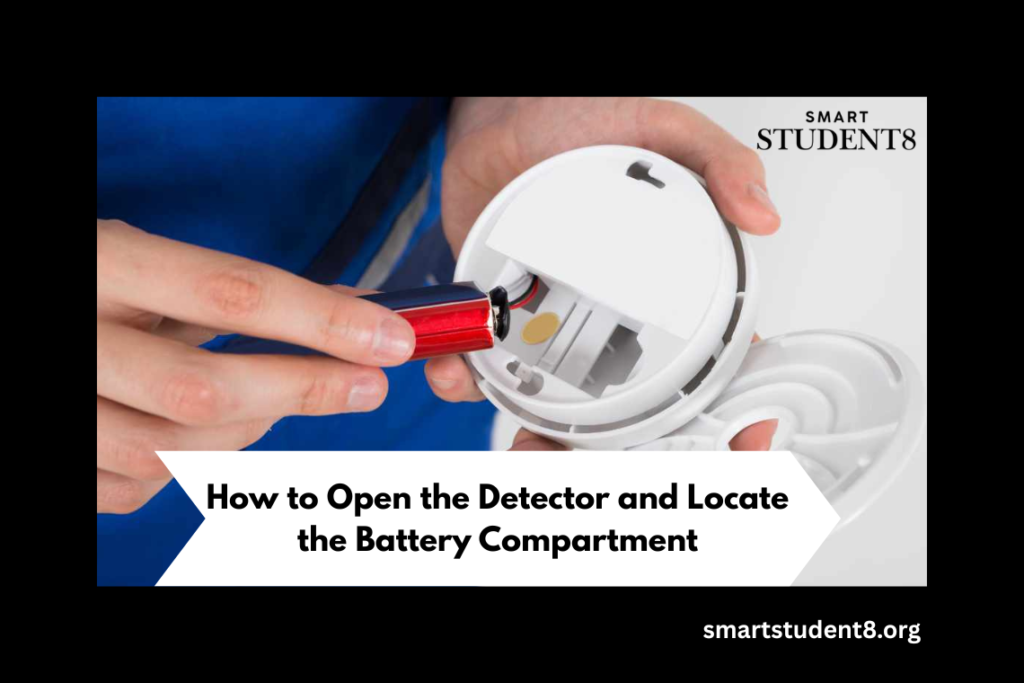
Once the cover is off or the unit is twisted from its base, the battery compartment is almost always clearly visible. On many modern alarms, the battery might be housed in a small pull-out drawer or held in place by a simple clip. Gently remove the old battery and note the correct orientation for the new one (positive and negative terminals).
Fixing Dust, Power, and Placement Issues
If you’ve done the battery swap and the reset, but that annoying noise is still happening, it’s time to troubleshoot for environmental and structural causes. These often involve a quick cleaning or slight adjustments in where the unit is located, which are easy DIY fixes that don’t require an expert.
Don’t panic yet! These issues, while more complex than a dead battery, are often the root cause of “mystery chirps.” We’ll explore how simple maintenance and smartstudent8.org placement can make all the difference in achieving a silent, reliable detector.
Cleaning Your Smoke Detector: A Crucial Maintenance Step
As we mentioned, dust, spiderwebs, or tiny bugs can trigger false alarms or intermittent beeping by blocking the sensor’s chamber. To clean it, first power it down (disconnect the battery and/or turn off the circuit). Then, take the unit down and use a can of compressed air the kind you use for cleaning keyboards to blow into the venting slots gently.
You can also use the soft brush attachment on your vacuum cleaner to remove dust from the outside casing carefully. Never use water, cleaning sprays, or harsh chemicals, as this will destroy the sensitive internal components. Once clean, reinstall and test it!
The Nuisance Alarm: Relocating Detectors Near Bathrooms or Kitchens
Are you experiencing constant, short-lived alarms when you make toast or take a super-hot shower? This is a classic “nuisance alarm” problem, and it’s all about placement. High humidity (steam) and cooking smoke are the most frequent culprits for false alerts.
If your detector is right next to a bathroom or within 20 feet of cooking appliances, consider moving it slightly further away. You need detection, but not so close that everyday activities trigger it. It should be at least 3 feet away from any door that leads into a kitchen or bathroom.
Hardwired Alarms: Identifying and Fixing a Power Interruption
Hardwired smoke alarms (the ones connected to your house wiring) often have a small indicator light that should be green or solid red, signifying continuous power. If this light is off or you notice a constant chirp even with a new backup battery, you might have a power interruption issue.
This could be as simple as a tripped breaker that affects the entire circuit, or a loose connection at the wall plate where the detector mounts. Check your breaker box first. If the problem persists and all other electrical components on that circuit are working, you might need an electrician to check the wiring connection behind the detector.
Handling Alarm Interconnection Issues
Many homes have interconnected systems, meaning if one alarm goes off, they all go off. If one of these interlinked units is chirping randomly, it could be a communication error rather than a problem with the unit itself. Sometimes, when a battery dies in one unit, it sends an error signal to the entire system.
The easiest fix here is often a full system reset: turn off the power at the breaker, remove all backup batteries from every single detector, leave them powered down for 15 minutes, reinstall all fresh batteries, and then restore power. This forces all units to ‘re-sync’ and often clears up the communication glitch.
When to Replace the Entire Smoke Alarm Unit
It’s easy to forget that smoke alarms have an expiration date. Just like milk or car tyres, they don’t last forever, and trying to nurse an old unit along compromises your safety. Knowing when to toss the old model and buy a sparkling new one is a vital part of home safety maintenance.
Upgrading your unit is a fantastic opportunity to take advantage of modern features like sealed lithium batteries (no more annoying battery changes for 10 years!) or smart technology that alerts your phone. Think of it as a safety refresh for your whole house!
Understanding the 10-Year Replacement Rule
This is a non-negotiable rule set by safety organisations everywhere: smoke alarms must be replaced every 10 years. The sensitive sensors inside, whether ionisation or photoelectric, degrade over time and become slower to react or more prone to false alarms. After a decade, they are no longer reliable.
If you don’t know how old your current alarm is, take it down and look on the back. You will find a manufacturing date stamped on the plastic casing. If that date is ten years ago or more, it is time for a replacement, no troubleshooting needed!
Testing Your New or Existing Smoke Detector Correctly
Once you’ve installed a new battery or a new unit, you absolutely must test it to ensure it’s fully functional. Don’t just rely on the silent light! Locate the “test” button and press and hold it until the full, loud alarm sounds. This tests the internal circuitry and the horn.
You should be testing every smoke alarm in your home at least once a month. Please put it on your calendar for the first day of every month so it’s never forgotten. This consistent testing ensures that when a real emergency occurs, the alarm is ready to sound.
The Benefits of Upgrading to Smart Smoke Alarms
If you’re replacing an old unit, seriously consider upgrading to a smart smoke alarm. These devices offer incredible peace of mind! They connect to your home Wi-Fi and can send alerts directly to your phone if the alarm sounds, which is perfect if you’re at work or away on vacation.
Smart alarms also often offer superior features, such as dual-sensing technology (which detects both fast-flaming and slow-smouldering fires) and voice alerts that tell you exactly what the danger is (e.g., “Warning! Smoke detected in the kitchen!”). It’s a fantastic investment in modern safety.
Final Safety Checks and Ensuring Peace of Mind
Congratulations! You’ve officially conquered the irritating smoke alarm chirp. The final step is to put a reliable safety plan in place so you’re always prepared. This includes a simple maintenance schedule and ensuring you have all the necessary emergency information easily accessible.
A few minutes of planning now can save you loads of trouble and potential danger down the road. You deserve to relax and feel confident that your home safety system is operating at peak performance.
Creating a Regular Smoke Alarm Maintenance Schedule
To avoid that surprise 3 AM chirp, get proactive! Create a simple schedule:
- Monthly: Press the test button on every single detector.
- Twice Per Year: Change the batteries in all standard (non-sealed) alarms. A popular, easy-to-remember strategy is to change them when you adjust your clocks for Daylight Saving Time.
- Annually, gently clean the exteriors of all units with a vacuum or compressed air.
- Every 10 Years: Replace the entire unit, no matter how well it seems to be working.
Emergency Contact Information and Fire Safety Resources
Make sure everyone in your home knows the emergency numbers. Post a clear list near the phone that includes 911 (or your local emergency number) and your local fire department’s contact information.
Additionally, walk through an escape plan with your family twice a year. Identify two exits from every room and establish a safe meeting spot outside the home. A working smoke alarm is step one; a practised escape plan is step two!
Conclusion
Creating a robust, regular maintenance schedule is surprisingly simple and helps avoid those nasty surprise chirps. Commit to testing all your detectors monthly by pressing the test button. Twice a year, when you change your clocks for Daylight Saving Time, change all the standard batteries. It’s the easiest way to remember!
Most importantly, adhere strictly to the 10-year replacement rule, as internal sensors degrade over time and must be replaced after 10 years. Beyond maintenance, ensure your family has practiced an escape plan, knows two ways out of every room, and has a safe, designated meeting spot outside. A working alarm is step one; a practiced escape plan is step two!
FAQs
How often should I test my smoke alarms?
Test your smoke alarms monthly using the test button.
Why is my hardwired smoke alarm beeping even after I changed the battery?
It likely needs a system reset, or the unit has reached its 10-year expiration date.
Can steam from a shower or cooking set off a smoke alarm?
Yes, steam and cooking smoke are common causes of nuisance alarms.
What is the average lifespan of a standard smoke detector?
Replace standard smoke detectors every 10 years.
How do I safely clean dust and debris out of my smoke alarm?
Use canned compressed air or a soft vacuum brush to clean the vents gently.
What is the difference between an ionisation and a photoelectric smoke alarm?
Ionisation detects fast fires; photoelectric detects slow, smouldering fires.
Where is the best place to install a smoke alarm in my home?
Install one inside and outside every sleeping area and on every level.
Why is only one of my interconnected alarms beeping?
The single chirping unit is typically experiencing a problem (dead battery, dust, or end-of-life).